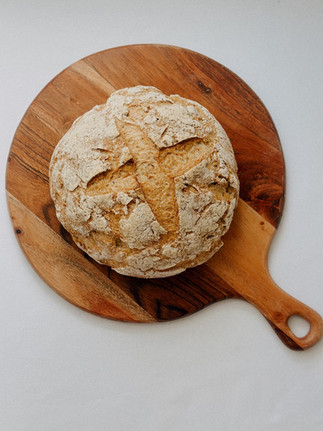
Gluten Free Sourdough Bread
- Leah Drumheller
- Oct 30, 2023
- 3 min read
Updated: Oct 4, 2024
If you're reading this it means you are likely ready to make your first gluten free sourdough loaf! And if you aren't just yet, you can check out my instructions to get started here, and within a week, you will be ready to make your own gluten free sourdough loaf!

Ingredients:
2 cups King Arthur Gluten Free Measure for Measure Flour
1 tsp Salt
1 ½ cups Water, room temperature
2 tbsp Honey
1 tbsp Olive Oil
3 tbsp Psyllium Husk, whole
1 cup Sourdough Starter
White Rice Flour
Before you are ready to start making your gluten free sourdough loaf, you will need to feed your starter with ½ cup of gluten free flour and ½ a cup of water. Do this 6 to 12 hours before.
In a large glass bowl, whisk together the flour and salt.
In a separate bowl, combine the water, honey, olive oil, and psyllium husk. Let it sit for a few minutes or until it begins to thicken
Once the psyllium husk mixture has thickened, mix in the sourdough starter.
Add your wet ingredients to your dry ingredients and mix with a dough whisk until roughly combined. Cover with plastic wrap or a towel and set aside for 30 minutes in a warm place.
Knead the dough until you can form it into a smooth round bowl. Dust a clean bowl or banneton basket with white rice flour, place the dough seam side up, cover, and let proof on the counter for another 2 hours.
The next step is the long proof phase. I have found that the best method for proofing a gluten free loaf is a long proof in the fridge. Place the loaf in the fridge for 8 to 12 hours.
Once the long proof is over, it is time to shape your dough:
Flatten the dough into a rectangle, being careful not to cause any tears or holes.
Fold the dough into thirds, creating a trifold, and then roll into a ball. Knead gently to close the seams and shape the loaf.
Rest for 15-20 minutes and repeat.
The last step before baking is one more shorter proof. Place the dough seam side up in the bowl/basket and cover with the rest of the towel. Let it proof on the counter for 2 hours.
30 minutes or so before the final proof is over, preheat your oven to 500F with your dutch oven inside of it.
Once the oven has preheated, lay a piece of parchment paper down on the counter and place the dough seam-side down. Score the dough in any design you would like using a bread lame or a knife. Then, carefully place the dough into your dutch oven.
Drop your oven temperature to 450F and bake the loaf with the lid on the dutch oven for 45 minutes.
Remove the lid and bake uncovered for 20 minutes.
When the loaf is done baking, immediately remove from the dutch oven and place on a cooling rack. As tempting as it may be, do not cut into your loaf! You need to let it cool for a few hours before you slice into it, otherwise it will be gummy.
Notes:
Making gluten free sourdough bread is time & labor intensive! Add in the cooling time and it is close to a 24 hour process. I like to start my loaf at 7 or 8 in the morning so that I can bake it before I go to bed. This allows it to cool completely overnight, making it perfect to eat in the morning.
You can find all the tools I use to make my gluten free sourdough bread on my amazon storefront under Sourdough Starter Kit. Full disclosure, I can earn commissions off of anything purchased from this kit, but I promise that I would not link anything if it wasn't what I was already using!
This recipe has been updated as of October 2024 based off of feedback and further recipe development!


I have made this recipe at least a dozen times and love it. I have noticed it makes a small loaf. Do you think I could double the recipe to get a larger loaf?
Is there another kneading step between steps 6 & 7 or do you just put the bowl from the counter to the fridge?
If the texture comes out slightly yummy in the middle (i live in Florida) would you recommend keeping everything the same and decreasing the water a little to test that first?
So I made 2 loafs for my wife's best friend, a plain loaf and a cheddar loaf. She loved them. We all tried them together and loved the recipe. Thanks so much. I will be making another batch soon to ship to my son. H can't wait ;-)
ok
replica rolex watches
replica tissot watches